IT Technician Fetchit Installation Guide

Table of Contents
- What is Fetchit®
- Prerequisite Resources:
- Configuring Phone System
- Gathering PMS settings and information
- Creating an entry for this Client on Fetchit Orion
- Fetchit Desktop App Installation
- On-Premises Fetchit Installation
- Upgrading Legacy Fetchit to the current version
- CallerID box Fetchit Installation
- Cloud PMS Fetchit Installation
- Testing with Broadcast
- Troubleshooting Issues
- Reasons why bubbles may not appear in Fetchit
What is Fetchit®
Fetchit® is a proprietary software acquired by Schultz Technology in 2020 from The Pet Hospital Solutions LLC. It allows clients to have instant access customer information from their Patient Management Software (PMS or CRM) when the phone rings. This allows the phone representative to see the client’s patient chart and other appointment-specific information. This speeding up the call and bypassing the initial data-collection (e.g. “Hello, who’s speaking”, “when did you last come in?”, “what is your pet’s condition”). This will save clients several minutes per call, decreases customer call time and increases call volume as well as customer satisfaction.
This document will go over how to set up the Fetchit® desktop application and how to install it on both the server and workstations as needed.
WARNING: There is a legacy version of Fetchit developed by The Pet Hospital Solutions prior to acquisition. Please use the legacy Fetchit guide on ITGlue to install or troubleshoot that version.
Prerequisite Resources:
To properly install Fetchit®, you will need access to the following resources.
- ConnectWise Control / Screen Connect
- Fetchit Orion
- Information about which Phone System the client uses:
- Clear Voice (by CoreDial)
- Ring Central
- White Label
- Skyswitch
- CallerID Vertex box (If their phone system is none of the above)
- Client’s Patient Management Software (PMS)
If you do NOT have access to these systems, reach out to the IT Teams Chat for information/ assistance.
Configuring Phone System
Prior to the installation of the Fetchit application, you will need to configure the customer’s phone system via the provider portal to allow Fetchit to watch for incoming calls and consequently create its popups. Each phone system provider usually employs an API or web hook system to relay caller information to Fetchit.
Follow the steps for the phone provider used by the client you are installing Fetchit for:
Phone System: CoreDial (Clear Voice)
Creating a Fetchit user in Clear Voice
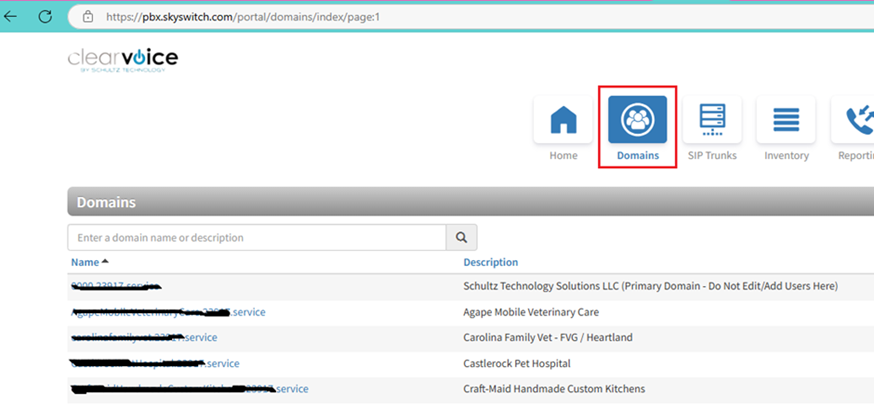
ClearVoice is a Schultz Technology-named, white labelled portal provided by CoreDial. Before you start setting up a Fetchit installation, you must configure the client in ClearVoice.
Step #1:
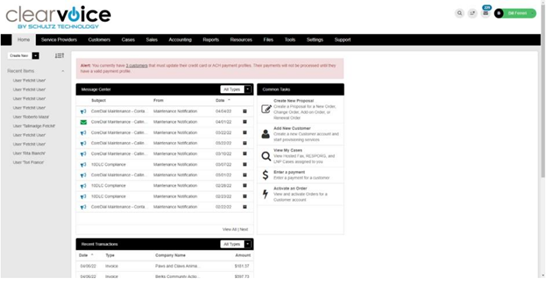
Log into ClearVoice and access the Account Manager
Step #2:
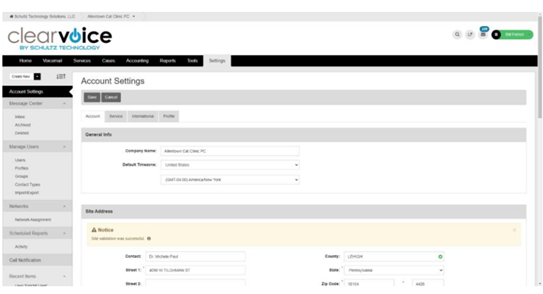
Select the Customer and go to the Account Settings tab.
Step #3:
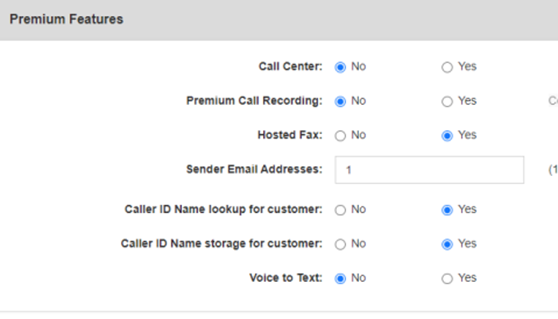
Under the Service tab, enable Caller ID Name lookup & storage and save.
Step #4:
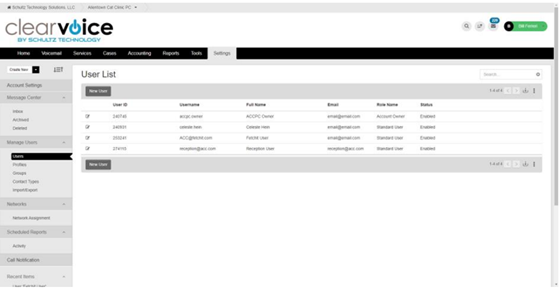
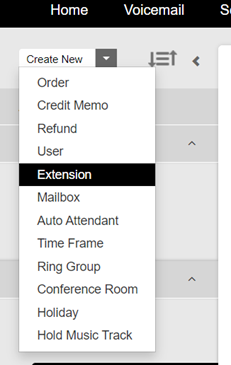
Under Manage Users
- Go to
Users>New User - Create a new user.
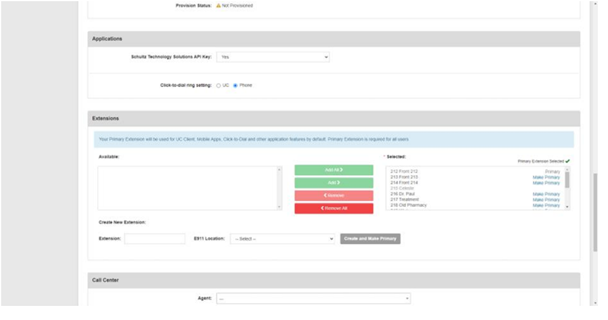
- Then scroll down and under Applications
- Select YES for Schultz Technology Solutions API Key
First Name: Fetchit
Last Name: User
Username: [site name]@fetchit.com
(e.g. dolittle@fetchit.com)
Password: Welcome123!
Step #5:
Add all extensions and select Primary, then Save.
IMPORTANT: Reminder to enter all generated credentials into ITGlue
NOTE: Clients that have Multiple Locations
If a client has multiple locations and only want Fetchit bubbles to appear for the respective location’s incoming calls, follow the steps listed below:
Step #1 - Create dummy phone extension:
Create a dummy extension for the customer outside of their normal extension range.
For example, if the customer’s regular phone extensions are 100-110, set a dummy extension such as 9998 so it is a safe, unused extension.
Assign the extension the name “Fetchit Dummy” and set its outgoing caller ID to the primary location site’s number. Use the default settings when creating the extension, filling in the fake name in the respective fields.
Leave the extension in its disabled state once created:

(Notice the icons aren’t green, i.e. inactive)
Step #2 – Create dummy user:
Create a dummy user with the following:
First Name: Fetchit
Last Name: Dummy
Username: <clinicname>fetchit@dummy.com (e.g. dolittlefetchit@dummy.com)
Make sure the Schultz Technology API key setting is set to No under the Application section. Under the Extensions section, only add the previously created dummy extension. Lastly, set Group Membership to All Users. This acts as a sinkhole for calls that would be globally shared i.e. those that would appear at both locations.
Step #3 – Create Fetchit User’s for each respective location:
Create a Fetchit user for each location site. Follow the same process you would when creating a regular Fetchit user.
First Name: Fetchit
Last Name: User
Make sure the Fetchit username is unique for each location site! For example, say we have two locations for Dolittle Animal Hospital:
- Dolittle Animal Hospital
- Dolittle Animal Hospital – West Country
Their respective usernames could be:
- dolittleah@fetchit.com
- dolittlewestah@fetchit.com
Lastly, under the Extensions sections only add the extensions associated with that specific location.
Do not add all the extensions blindly.
Step #4 – Create Groups for each respective location:
Next, create a Group for each client location:
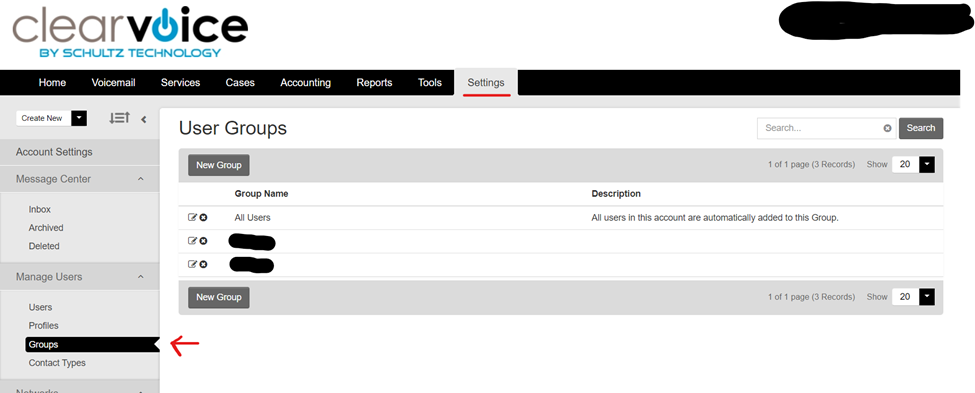
Name the groups after the respective location sites.
Under User Membership, Only assign the previously created Fetchit user to this group. For example, if the Group is created for the Dolittle Animal Hospital – West Country location, assign the dolittlewestah@fetchit.com under User Memberships.
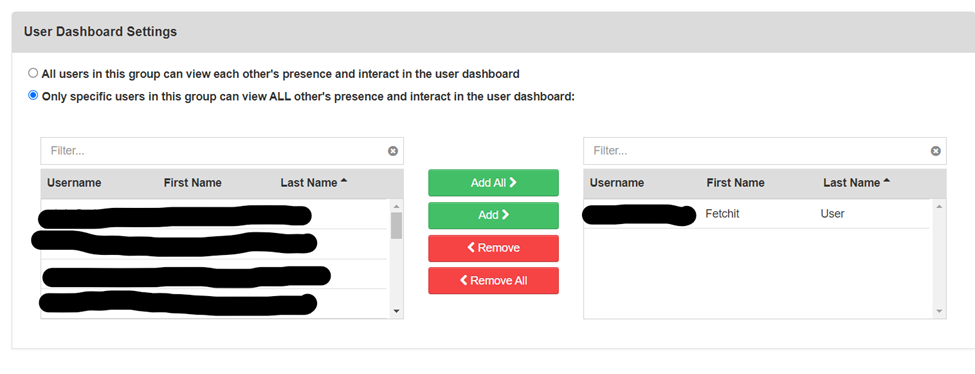
Next, under User Dashboard Settings, check the “Only specific users…” option and add the previously selected Fetchit User as shown above.
Make sure to Save the settings.
Complete this process for every location site.
Phone System: White Label Solutions
If the customer uses White Label for their phone system, complete the following steps:
Step #1:
In the White Label Fetchit portal go to Accounts > Client > Actions > VOIP
Step #2:
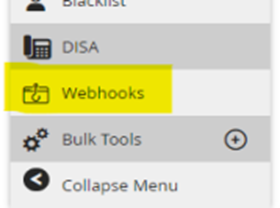
Once in the Account Settings screen select Webhooks
Step #3:
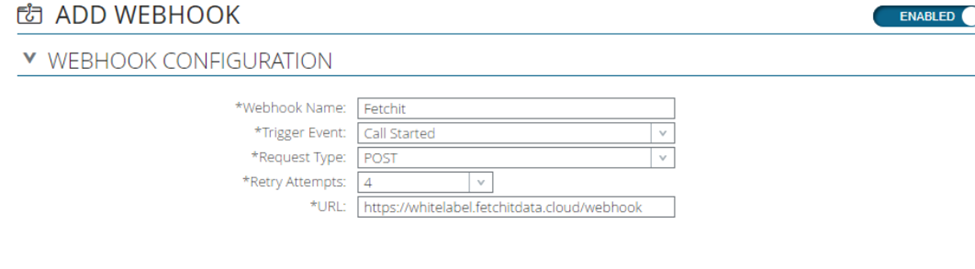
Select +ADD WEBHOOK and set up the WEBHOOK CONFIGUARATION as shown below
Step #4:
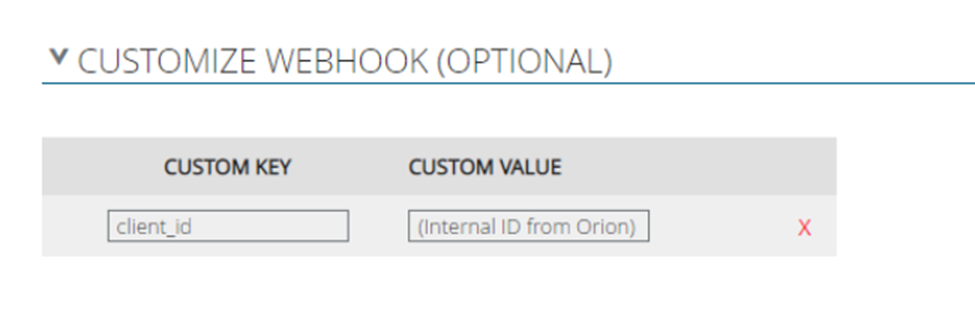
Select +ADD Row and fill in the Custom Key (Client_id) and the Custom Value (Internal ID from Orion). Then Save
Phone System: Ring Central
If the customer uses Ring Central as their phone provider, do the following:
-
Head to https://developers.ringcentral.com/login and login using the customer’s Ring Central phone number. If the login fails, you may need to create an account using the customer’s Ring Central phone number as the username.
- Enter all generated credentials into ITGlue!
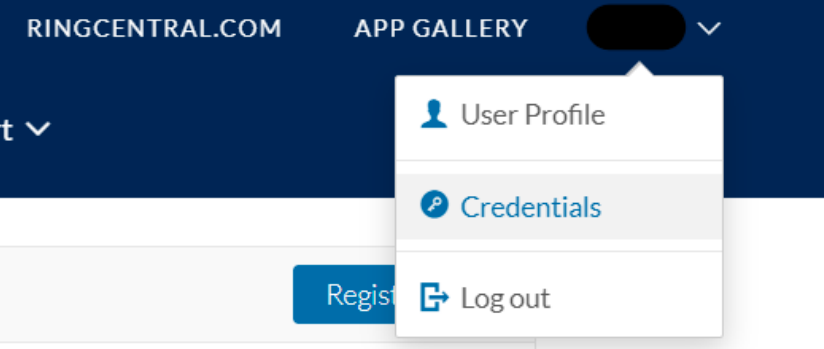
- Navigate to the Credentials page from the top-right user dropdown menu.
- Create a JWT token with Fetchit as the label.
- Only authorize the JWT token for a specific app’s Client ID.
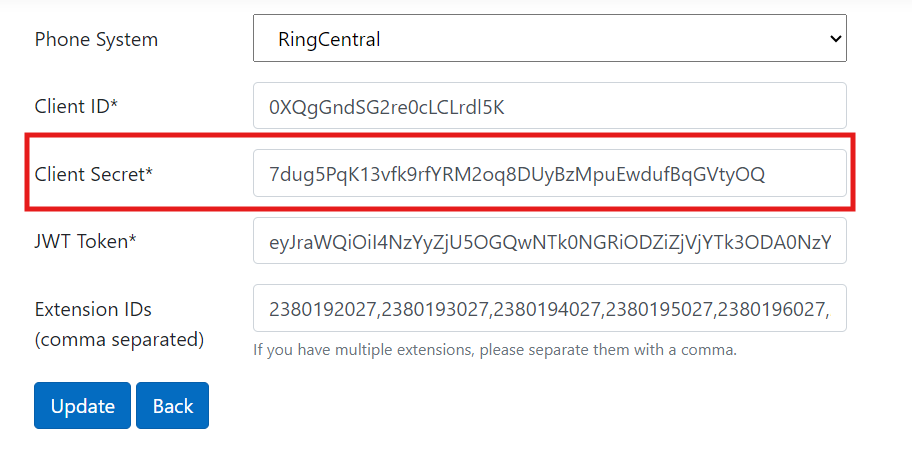
- The Client ID for Fetchit is
0XQgGndSG2re0cLCLrdl5K - Client Secret to be added into Orion later
7dug5PqK13vfk9rfYRM2oq8DUyBzMpuEwdufBqGVtyOQ
- The Client ID for Fetchit is
- Create the JWT token and save it securely. It will be entered into Orion when creating the phone worker in a later step.
Phone System: Skyswitch
If the customer uses Skyswitch as their phone provider, do the following:
-
Login to Skyswitch Manager Portal (skyswitch.com) and create a new user under the customer’s domain. This user will be used for making API calls. The user should have the “Scope” of “Office Manager”. See example below.
Note down the username and password for this user. These credentials will be used when setting up the client in Orion.
Note: You can login to the Manager portal using the API credentials provided by Skyswitch support. The username for this is API@schultztechnology and the password is stored in ITGlue.
-
Go to Domains and copy the Domain Name associated with the customer.
Phone System: Other/Unsupported = use CallerID Vertex Box
If the client uses a phone system that is not integrated with Fetchit, they will most likely have a Vertex CallerID box installed and billed by Schultz Technology.
If they do not already have a CallerID box installed, contact Operations & Procurement. Once the CallerID box is configured and installed on their network, skip to the PMS Settings section.
Gathering PMS settings and information
Once a client’s phone system provider is setup, the next step is to gather credentials from the PMS to configure Fetchit (in Orion) at a later step. Clients use two classes of patient management software (PMS):
-
On-Premises software that is installed on servers and workstations at the clinic location site.
-
Cloud-based software that is accessed through an online portal via their web browser.
For the cloud-based PMS, we need to gather some information/credentials which will be entered into Orion, allowing Fetchit to correctly integrate with them and provide its functionality. This section will guide you through the various online portals for each Cloud PMS and what information is required. FOR ON-PREM PMS: If you are installing Fetchit for a client that uses AVImark or Cornerstone, skip to the Fetchit desktop app installation section.
Impromed
For a new install at a clinic that uses Impromed, make sure to call Impromed Support before-hand and ask them to create a read-only user to the SQL Impromed database so that Fetchit can read and sync with the database.
Enter all credentials into ITGlue!
If the clinic is a pre-existing Fetchit user, this step will likely be completed. Refer to ITGlue for the Impromed database username/password during the Fetchit desktop installation step.
ezyVet
Goal: Download ezyVet API integration credentials On a client’s machine, access their ezyVet portal using an administrator’s account.
- Navigate to their ezyVet portal on a web browser. (usually
.ezyvet.us-east-2.com or similar) - Click on the red “Admin” tab on the ezyVet portal
-
On the left-sidebar, select “Integration” from the drop-down menu.
-
WARNING: This ezyVet configuration may have already been completed previously for some longstanding ezyVet customers. To avoid credential duplication, check:
- On the left-sidebar, scan the list of integrations.
- If “API Partner (Fetchit)” is found (try the search function), click that entry and download the credentials.
- Else, if this entry is not found, follow the remainder instructions below.
-
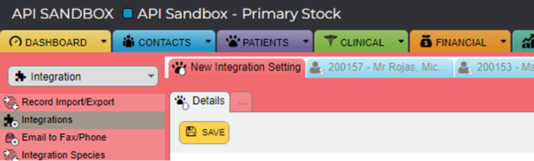
On the left-sidebar, select “Integration” from the drop-down menu.
-
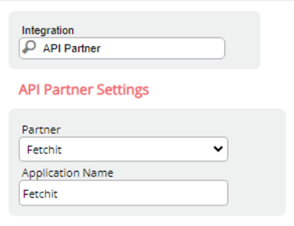
Enter ‘API Partner’ in the Integration text input field.
-
Under the Partner field, choose Fetchit and name the application Fetchit.
- Click Save! to ensure the settings are saved! If you miss this step, you must start over.
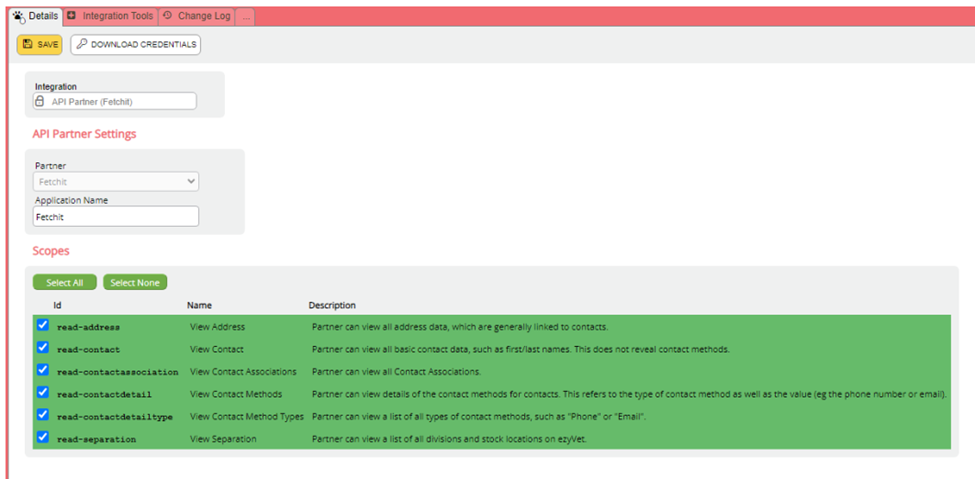
- On the following screen, you should see a Scopes section show up.
- Click “Select All” under Scopes. Click Save and wait a few seconds for the records to update.
- Click “Download Credentials”. This file contains the Client ID, Client Secret to be entered into Orion’s CRM Settings in a later step. Keep this file handy until the Orion PMS (CRM) Settings step.
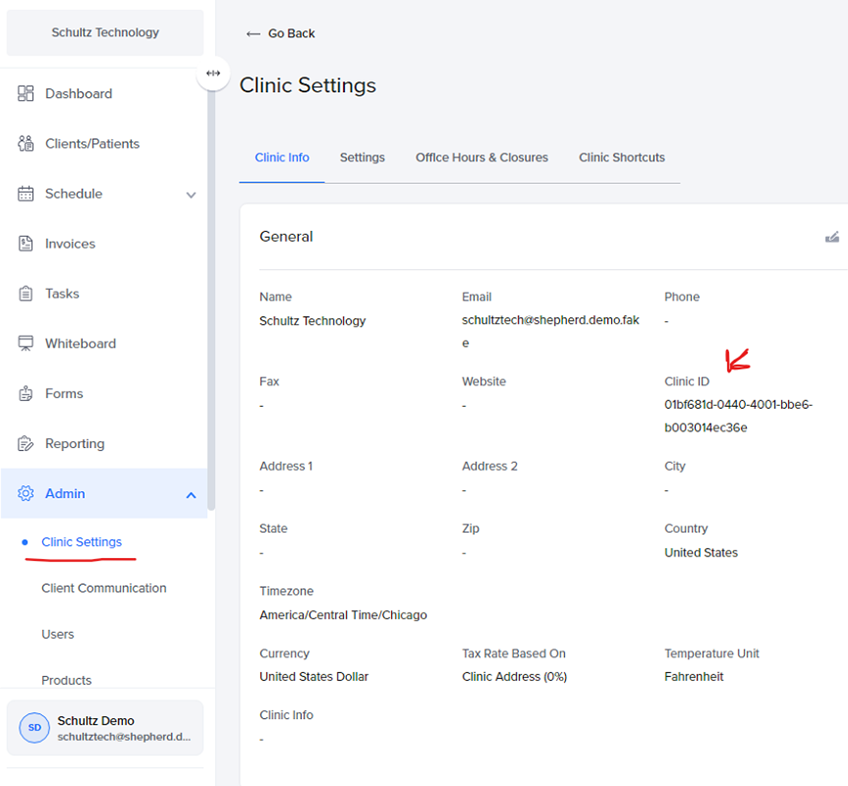
Shepherd
Goal: retrieve Shepherd Clinic ID
- Login to the Shepherd portal using an administrator’s login credentials (app.shepherd.vet)
- On the left sidebar, open the “Clinic Settings” page under the “Admin” section.
- Copy the Clinic ID. This will be entered into Orion’s CRM Settings in a later step.
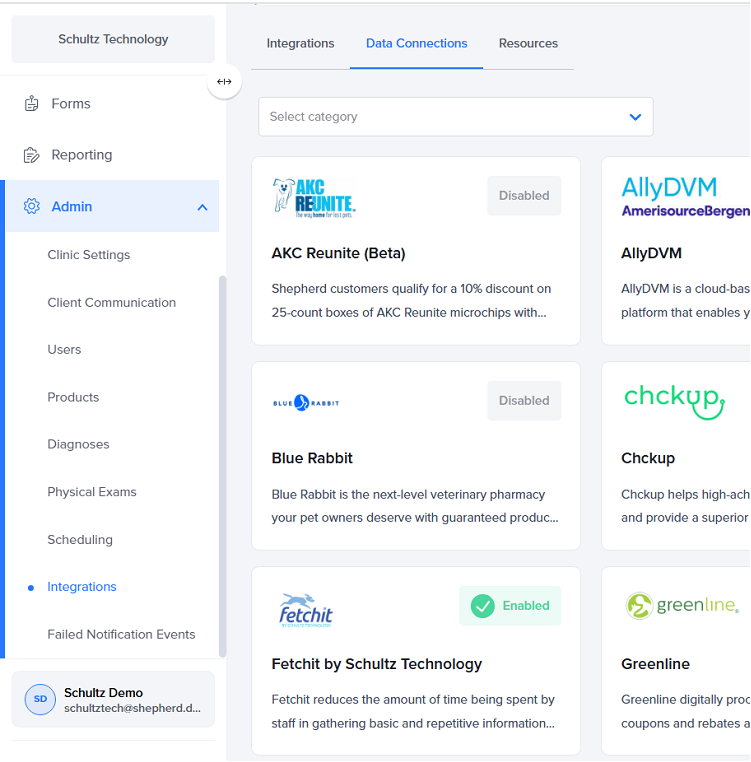
Goal: Enable Fetchit Integration
- Login to the Shepherd portal using an administrator’s login credentials (app.shepherd.vet)
- On the left sidebar, open the “Integrations” page under the “Admin” section and go to “Data Connections” tab. Enable the “Fetchit” app for integration.
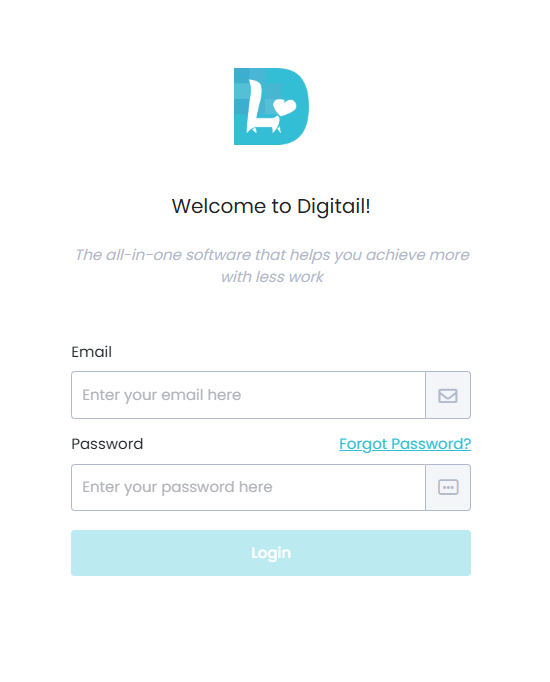
Digitail
You’ll need to acquire the login information for the Digitail’s Client. It should be a standard email along with a password.
If they are not comfortable handing that out, you may try asking them to create a new user info@fetchitdata.cloud and password
Rhapsody
Retrieve and save the Clinic ID from the Rhapsody portal. It can be retrieved from the URL.

In this case it would be KO4op6E3
Vetspire
Goal: Retrieve the API Key
- Click the “More” dropdown menu from the home navigation bar.
- Navigate to the “Admin” page.
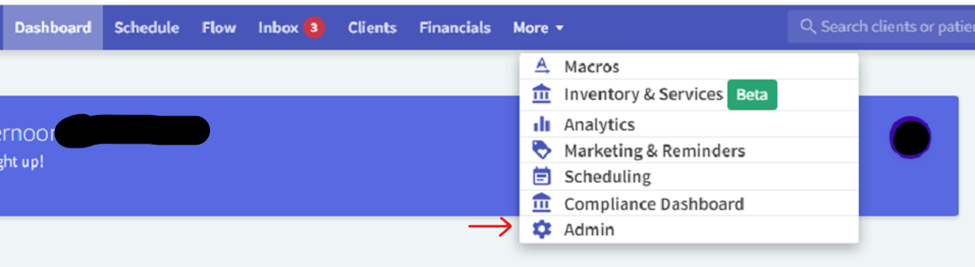
- Navigate to the “API Keys” page from the left-hand sidebar menu
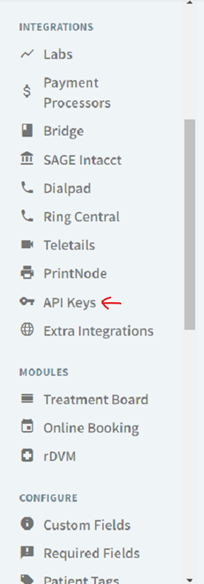
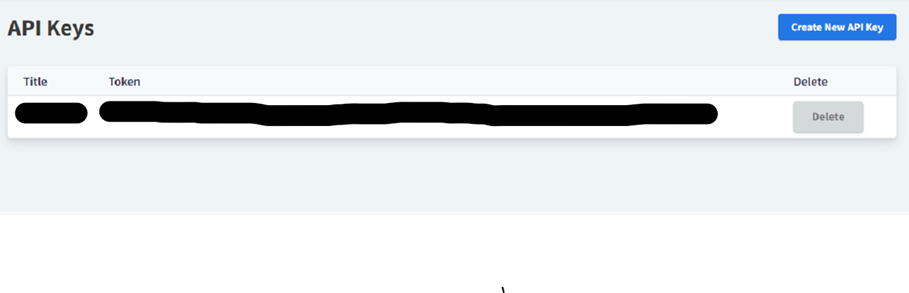
- Copy the API Token associated with Fetchit if already present. Save this securely. It will be entered into Orion later during the creation of PMS (CRM) Settings.
- If there is no API Token already present, create a new one titled Fetchit
VETport
Contact the VETport support team to get the following information for a clinic:
- API Base URL
- API Username
- API Password
DaySmart
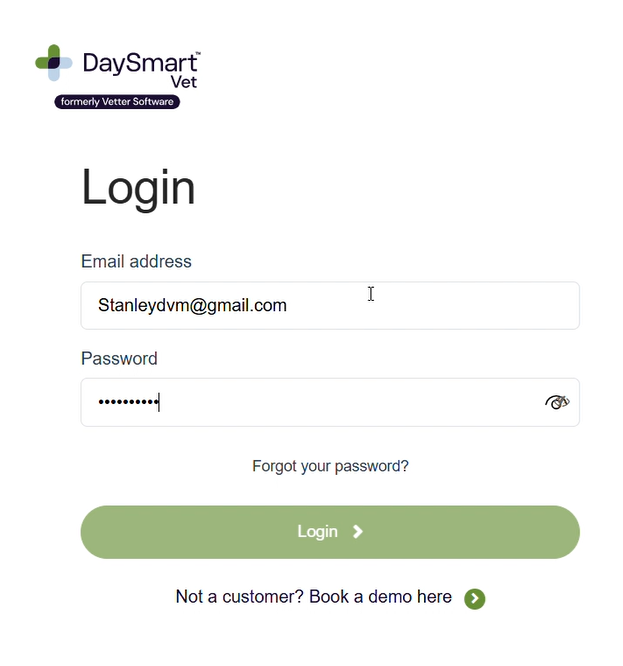
Navigate to https://vettersoftware.com/apps/index.php/october/login
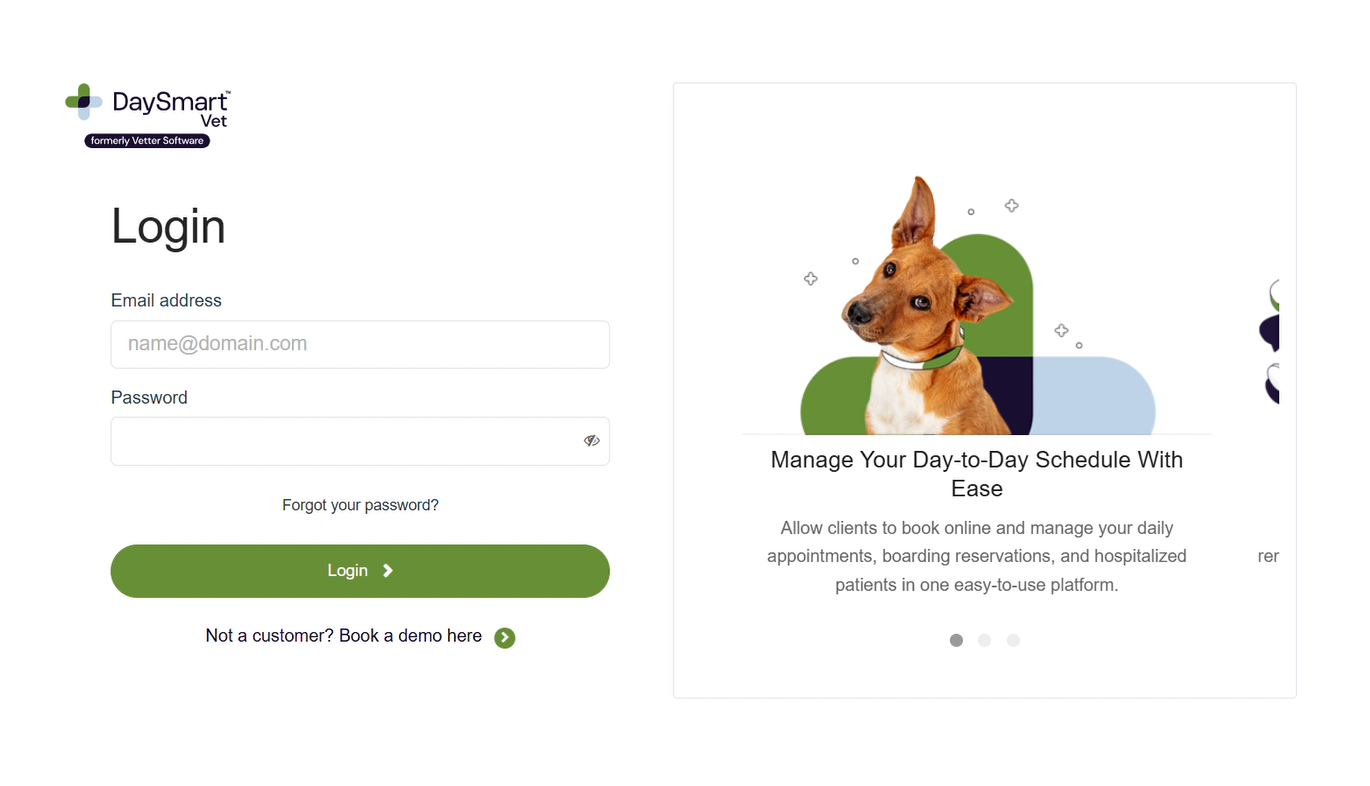
Login with the Clinic’s admin account
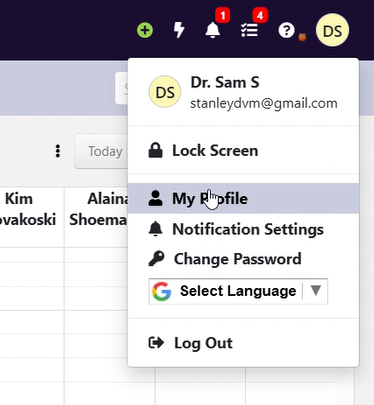
In the upper right corner click on your name Icon, in this case denoted by (DS)
Then click on My Profile
Click on List of All Staff
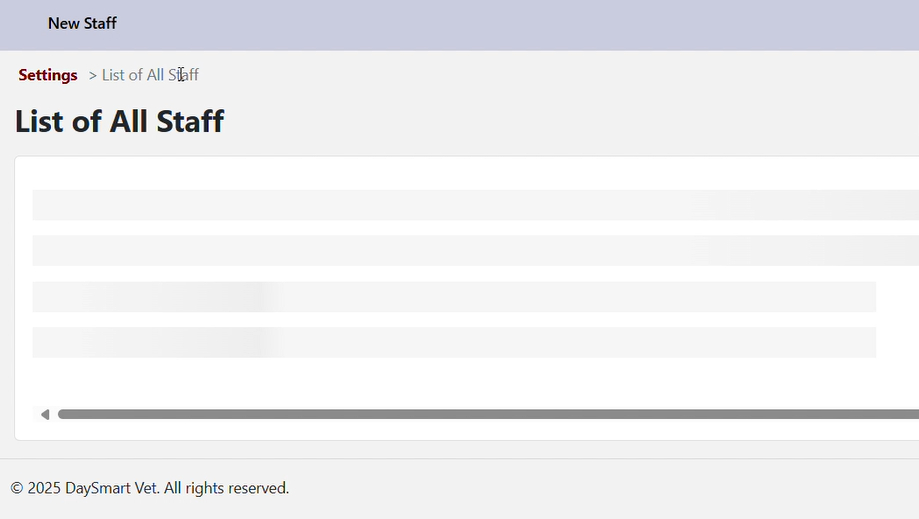
Click on New Staff

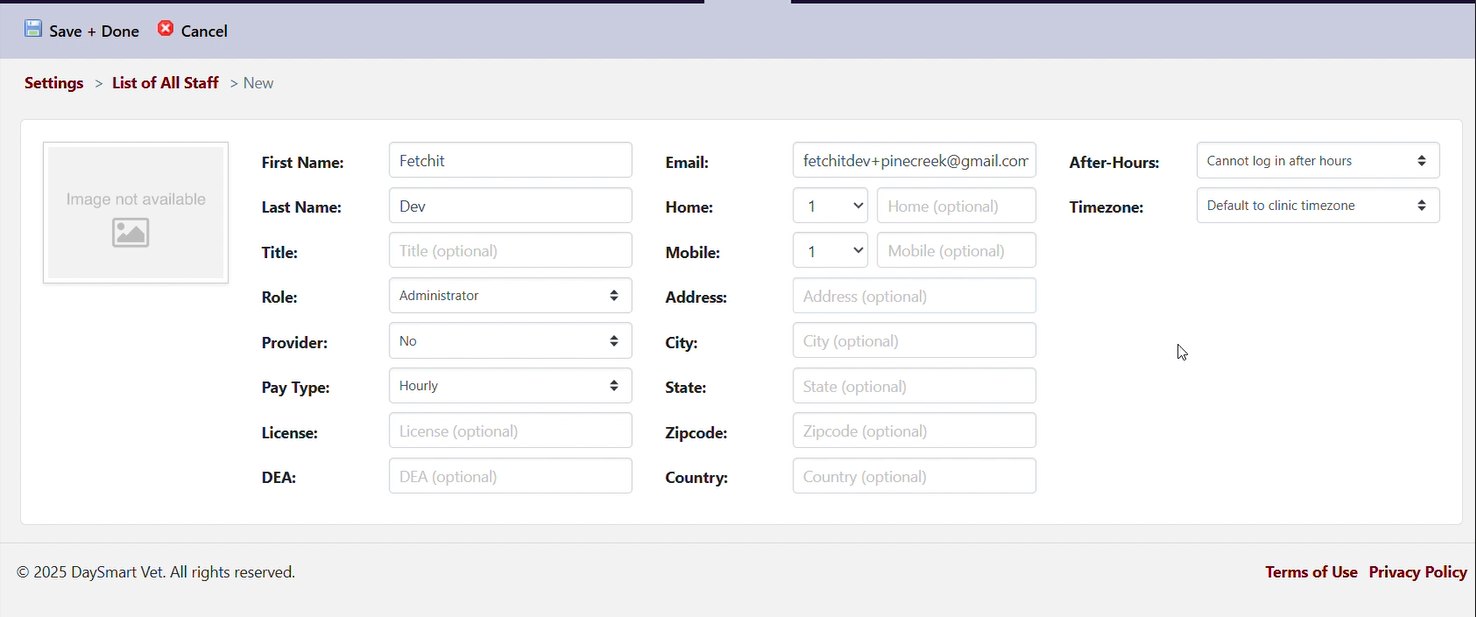
Fill all relevant information about the service account.
For the email do fetchitdev+{name_of_company}@gmail.com. This will allow us to create accounts under a slightly different alias while still getting the email sent to the same address.
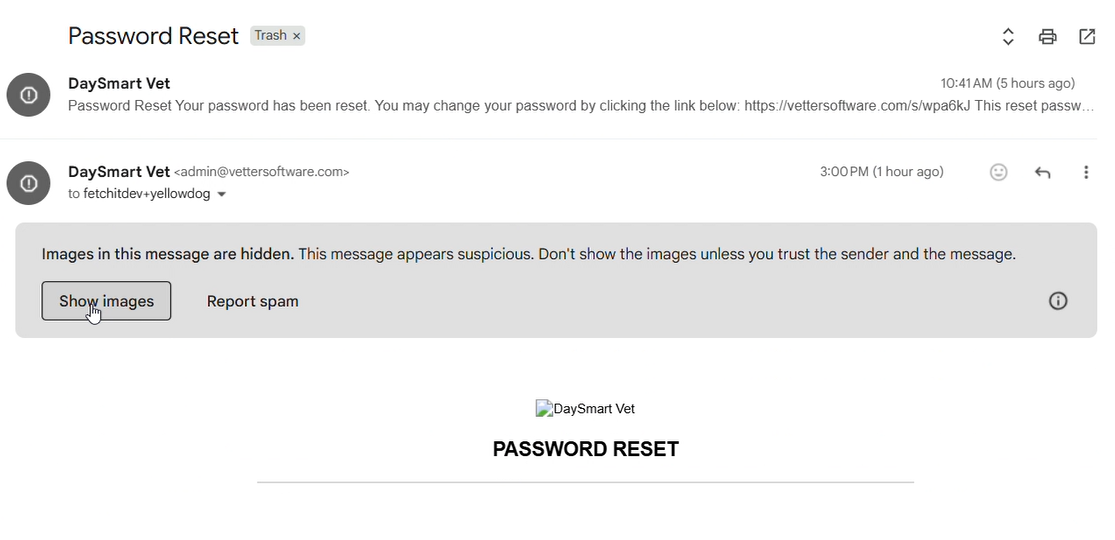
Log into fetchitdev@gmail.com and find the recently sent Password Reset, and create a new password. Be sure to save it for later.
Creating an entry for this Client on Fetchit Orion
Fetchit Orion is an internal tool developed to create and manage client settings for each Fetchit customer.
It allows us to -Setup the Fetchit phone worker pod (which connects and listens to the client’s provided phone system’s API/Webhook), add a Fetchit license and create PMS credentials for Fetchit to integrate with. -Create a client entry on Orion, head to the following site: https://orion.fetchitdata.cloud/
You will need to login using your Schultz Technology O365 credentials (i.e. Microsoft SSO) to access the following.
Step #1:
Go to the Client tab and select the Create option at the top of the screen.
Step #2 – Creating a client entry:
Copy and paste the company name from ConnectWise Manage and click Create. This will take you to the Client details page.
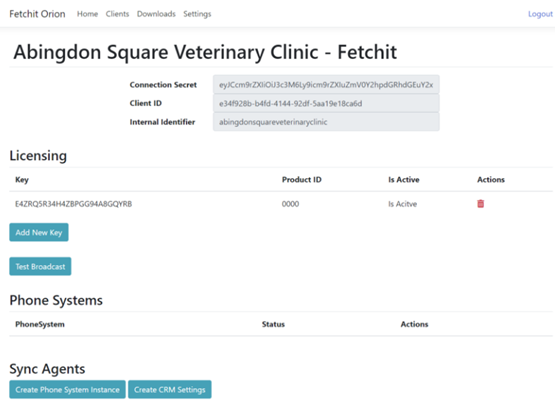
Step #3 – Adding a Fetchit License
If there is no License key present under the “Licensing” section, add one by pressing the “Add New Key” button. Do NOT add more than one license.
Step #4 – Phone System worker creation:
This step creates a Phone worker pod that lives on our cloud servers. This pod’s job is to connect to the client’s phone system (which you may have previously configured) and listen for incoming phone calls at the client site. When it picks up an incoming call, it sends a message to our backend lookup service which cross-references the incoming phone number to the client ID of their PMS. This allows our backend to dispatch the correctly colored (blue or red) and titled bubbles to the desktop Fetchit application.
If the client does not use a supported phone system (e.g.: CoreDial (Clear Voice), White Label, Ring Central, Skyswitch), skip this step. They will likely have a CallerID Vertex box installed which doesn’t require a Phone System worker configured on Orion.
If they do use Ring Central, CoreDial (Clear Voice), White Label or Skyswitch, Select Create Phone System Instance. Enter the respective phone system’s credentials you previously created or acquired in Configuring Phone System
For CoreDial (Clear Voice)
enter the associated Fetchit user’s username/password credentials from Clear Voice.
- For White Label: No additional steps required.
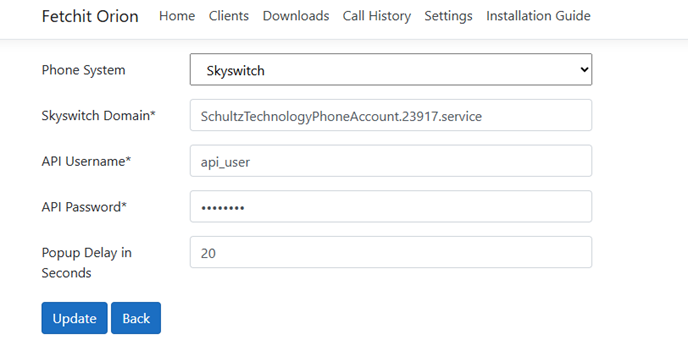
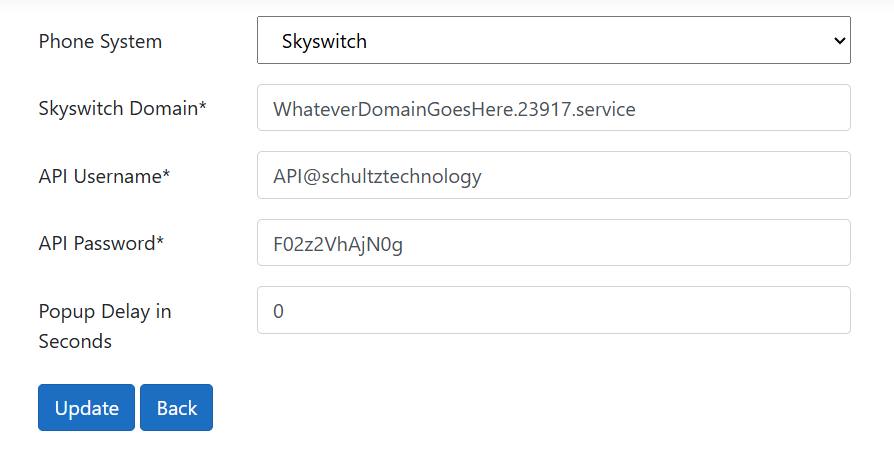
- For Skyswitch: Enter the following details:
- Associated Domain Name from the Skyswitch PBX Portal
- API Username and Password: created in Skyswitch PBX portal
- Popup Delay in Seconds: If you want to delay the incoming call popup for a customer by a specific interval, mention that here as well.
This setting can be adjusted to fix issues where the customers are complaining about seeing early popups.
For Ring Central
Enter the previously created JWT token from the Ring Central Developer portal.
Client Secret to be added into Orion `7dug5PqK13vfk9rfYRM2oq8DUyBzMpuEwdufBqGVtyOQ`
For White Label
No additional steps required.
For Skyswitch
Enter the associated Domain Name from the Skyswitch PBX Portal.
Username: API@schultztechnology
Password: F02z2VhAjN0g
Step #5 – PMS settings (or CRM settings):
Next, we will enter the previously acquired PMS settings and enter them into Orion in this step.
If the client uses AVImark, Cornerstone or Impromed, you may skip this step.
Select Create CRM Settings and enter the required CRM credentials:
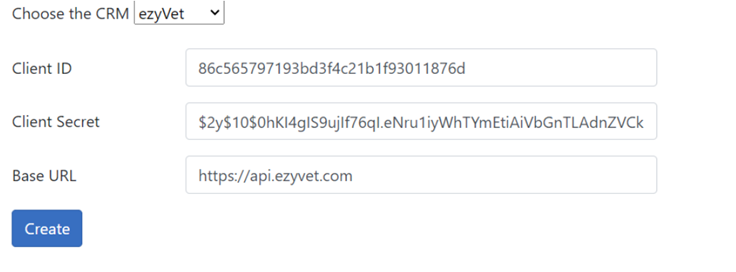
ezyVet
Copy & paste the Client ID and Client Secret downloaded from ezyVet
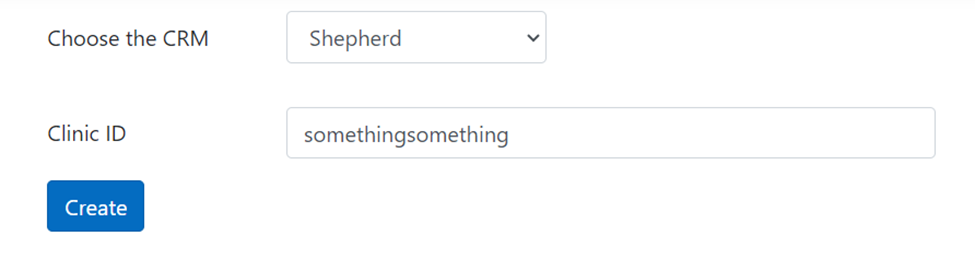
Shepherd
Enter the previously acquired Clinic ID
Vetspire
Enter the previously acquired API Token.
Rhapsody
Enter the previously acquired Clinic ID
Digitail
Enter credentials here in Orion.
From the Client Screen find

Then paste the Username and Password

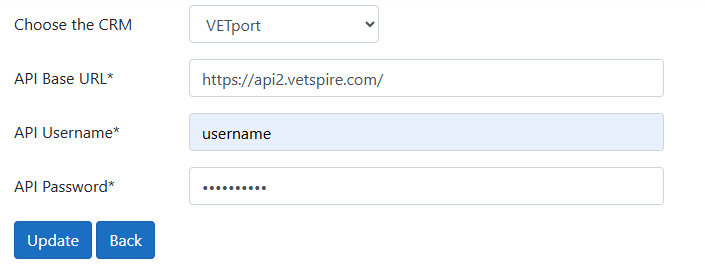
VETport
Enter the API credentials received from the VETport support team.
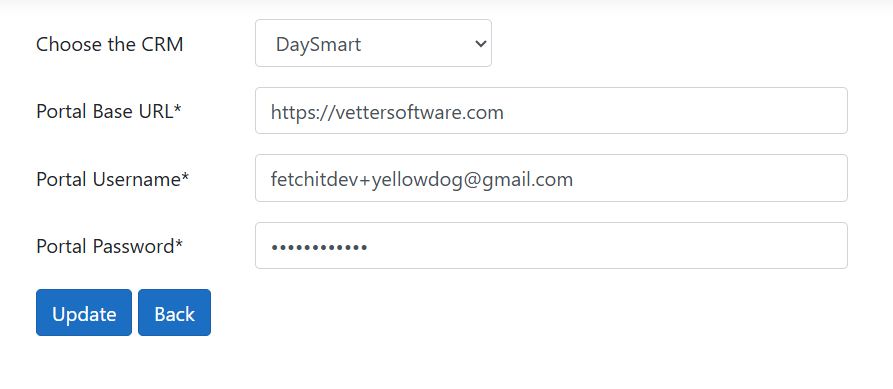
Daysmart
Choose DaySmart in CRM dropdown
Portal Base URL should be https://vettersoftware.com with nothing coming after it.
Fetchit Desktop App Installation
Is Fetchit already installed?
Before starting the installation process, check if Fetchit is already installed on the client’s computer.
Go to Control Panel > Programs > Programs and Features. There you will see all the programs the client currently has installed, if you see Fetchit, please uninstall (this will be an outdated version that we are going to be replacing). After confirming Fetchit is either uninstalled or not present on the machine, we can begin the new installation process.
Where do I download Fetchit?
Fetchit is internally available via Fetchit Orion
Navigate to https://orion.fetchitdata.cloud/ and login using your SchultzTechnology email. A code will be sent to your email where you can then log in.

Next, navigate to the Downloads page:

To get the most up-to-date version of Fetchit, select the Latest Release Version. This will download the latest installer file. For reference, Fetchit installers are deployed to the same Wasabi (AWS) cluster as the one used for data backups by IT.
Understanding the moving parts
The Fetchit desktop application has three key pieces that allow it to function:
- Client - The actual application that displays popups, call history etc. (i.e. Fetchit Desktop application)
- Service - Runs in the background in Kubernetes. Here there are 3 systems/services that ensure seamless communication of information
- Broker - The main backbone of Fetchit that takes call data and moves it through a pipeline of Services to Clients
- PhoneSystem Worker - This talks to the API (Coredial/Corenexa, Skyswitch, RingCentral, SIP, etc)
- Lookup Service - This takes a phone number and checks for it’s existence against the PMS (ezyVet, Avimark, Cornerstone, etc)
- Service - Runs in the background on server machines to sync data with On-premises PMS’ databases or listen to incoming SIP traffic passing through a CallerID box.
- Web extension – For Chrome, Firefox, Edge extension; allows Fetchit to open patient records for Cloud PMS (in the browser). Depending on the customer’s PMS and phone system, this installation process will differ. In the installer, Client refers to the actual Fetchit Desktop application and Service refers to the background Fetchit Service described above.
On-premises PMS setup:
AVImark
On their server machine, locate the AVImark installation directory.
You can confirm you have found the correct directory if it contains the file, Client.V2$
Save the path to this directory and keep it handy. (Copy the path from File Explorer’s URI)
Cornerstone
No additional steps required.
Impromed
If this is a first-time Fetchit install, ensure you have called Impromed Support as previously instructed and had them create a read-only user for Fetchit on their Impromed SQL database hosted on the customer’s server.
Else, gather the Impromed database credentials (username/password) from ITGlue.
Lastly, open SQL Server Studio on the server machine and find out what the Impromed database is called. It should be evident from the dropdown menu when asked to connect to the database.
Usually it is called: IMPROMED or Impromed
Also note the full server path; usually: Impromed/Clinic-Name
This database name is case-sensitive!
The Impromed database name, server, username and password will be entered into the fetchitServiceConfigurator in the next step.
On-Premises Fetchit Installation
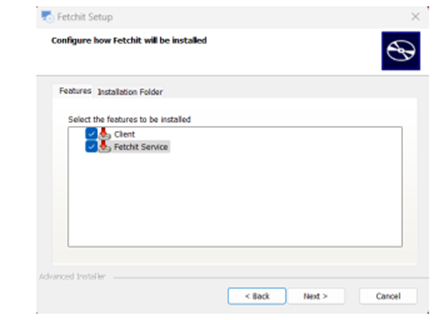
###For AVImark, Cornerstone or Impromed:
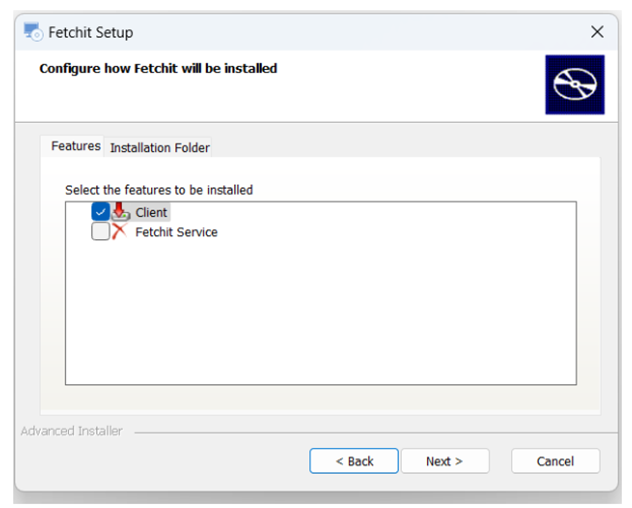
On the server machine, run the Fetchit installer in Administrator mode.
Select both Client and Service options.
Once install is complete, open File Explorer and navigate to:
C:\Program Files (x86)\Fetchit\Fetchit Service
Launch fetchitServiceConfigurator

Enter the appropriate information in the configurator. If this is misconfigured, the Fetchit Service will fail to start or may stop immediately after starting.
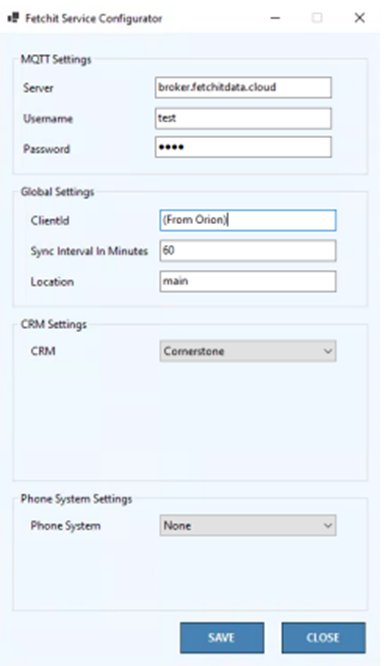
Server: broker.fetchitdata.cloud
Username: test
Password: test
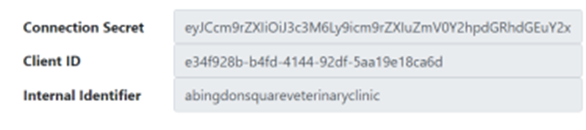
Client ID (located in Orion)
NOTE: CLIENT ID IS LABELED AS INTERNAL IDENTIFIER IN ORION
Sync Interval:60
Location: main
CRM: Choose yours (None if Cloud PMS)
Phone System: None unless CallerID Box
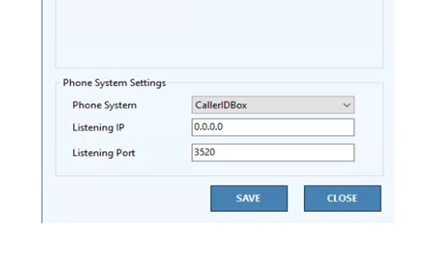
For CallerID Box:
IP: 0.0.0.0
Port: 3520
Finally, once you’ve clicked Save
Open the Services application and start the Fetchit Service.
Running this Fetchit Service will sync the data (in the background) from the PMS database to Fetchit’s servers. This may take a minute or two if the customer has a lot of data to sync. You can freely move on to the next step.
If you followed this setup correctly, the Service should still be running after a few seconds. You may double-check that it did not fail or throw errors via the Event Viewer application in Windows.
Open Event Viewer, navigate to Windows > Application Logs > and find Fetchit Service. If there are no errors after the event where it starts, you are clear.
On the workstation machines, run the installer in administrator mode:
Complete the installation and launch the Fetchit application.
NOTE: The installer now automatically adds Fetchit to the shell:common startup folder so that Fetchit automatically launches at startup for any logged-in user.
Careful: Fetchit will fail to launch at startup if the Fetchit shortcut is set to run in administrator mode and the initial logged-in user is not an administrator at machine boot up.
Once the Fetchit application has launched, it should appear in the Windows Task Bar Tray

Right click on the Fetchit application and open the Setup window.
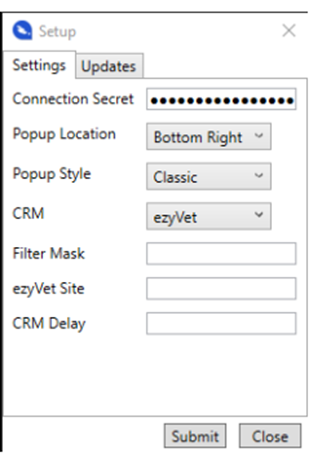
Enter the Connection Secret from the Orion page here.
Make sure to copy the full connection secret from Orion (use CTRL+A), else you may notice an error when you try to Submit it.
Lastly, set the Popup Style to ezyVet (cosmetic-only, up to preference)
Select your PMS (CRM) from the dropdown menu.
Remaining settings can be left as-is.
Click Submit to save these settings.
This marks the end of the Fetchit installation on bother server and workstation for on-premises PMS (AVImark, Cornerstone, Impromed).
To verify your installation was successful
Right click the Fetchit icon in the taskbar tray and open the History window.
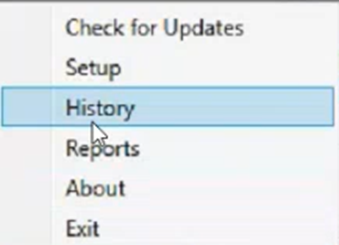

You should see some entries if this customer uses a phone system, and this wasn’t a first-time install.
To verify you correctly saved the connection secret, press the Test Broadcast button on Orion.
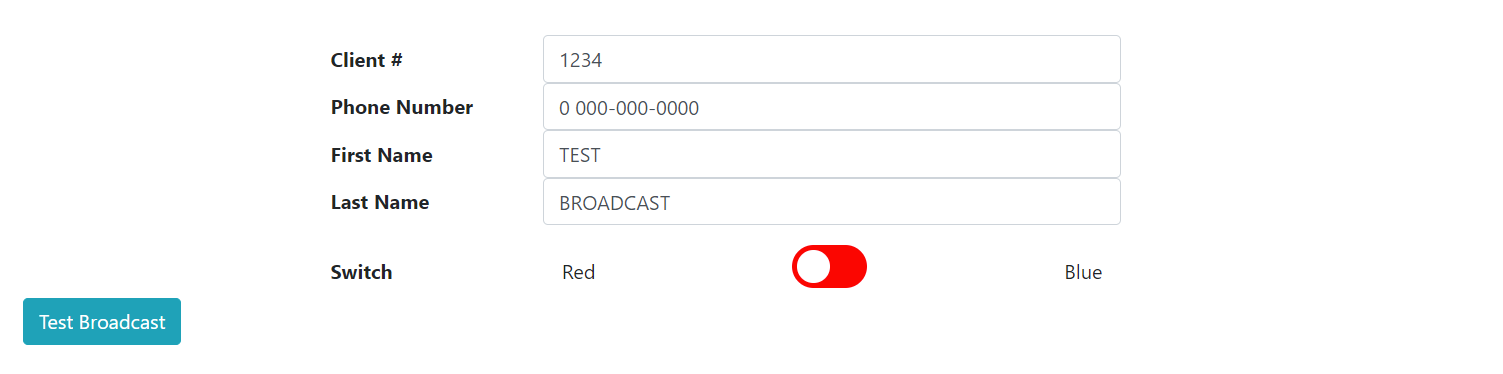
This will create a red Broadcast 0 0000-0000 popup appear on the screen.
If it doesn’t, the Connection Secret is incorrect; re-enter, save and try again.
Lastly, call the clinic where you just did this installation. You should see a popup show for your own call. This verifies that the Fetchit desktop application works (you saw a popup) and the phone worker/Fetchit service listening to incoming calls, or the Caller ID box works as well.
Upgrading Legacy Fetchit to the current version
If you are installing Fetchit for a customer that uses the Legacy version (v. 2.718 and below), uninstall the legacy application. Next, follow the previous section where Fetchit is installed for an on-premises PMS like AVImark, Cornerstone or Impromed.
CallerID box Fetchit Installation
If the customer uses a CallerID Vertex box, run the installer on their server machine.
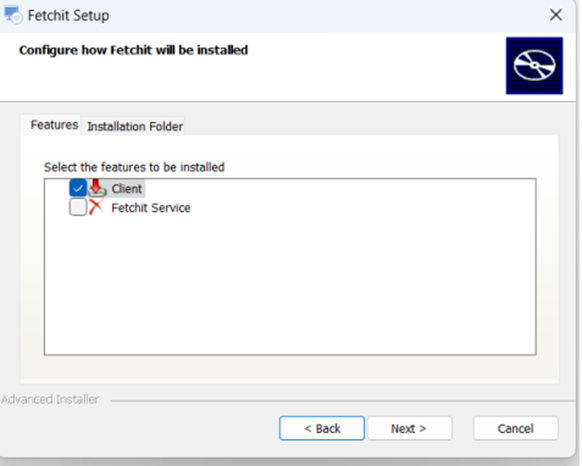
Only select the Service option in the installer.
Once install is complete, open File Explorer and navigate to:
C:\Program Files (x86)\Fetchit\Fetchit Service
Launch fetchitServiceConfigurator
Server: broker.fetchitdata.cloud
Username: test
Password: test
Client ID (located in Orion)
    NOTE: CLIENT ID IS LABELED AS INTERNAL IDENTIFIER IN ORION
Sync Interval:60
Location: main
CRM: Choose yours (None if Cloud PMS)
Phone System: CallerID Box
    IP: 0.0.0.0
    Port: 3520
Click Save and then run the Fetchit Service from the Services application. This will ensure that Fetchit can listen to incoming call traffic published by the Caller ID box on UDP Port 3520.
Cloud PMS Fetchit Installation
Fetchit need not be installed on the server machine unless the customer uses a CallerID Vertex box (Follow prior steps).
On every workstation machine, Run the Fetchit installer in administrator mode
Select the Client option in the installer.
Complete the installation and launch the Fetchit application.
NOTE: The installer now automatically adds Fetchit to the shell:common startup folder so that Fetchit automatically launches at startup for any logged-in user.
Careful: Fetchit will fail to launch at startup if the Fetchit shortcut is set to run in administrator mode and the initial logged-in user is not an administrator at machine boot up.
Once the Fetchit application has launched, it should appear in the Windows Task Bar Tray

Right click on the Fetchit application and open the Setup window.
Enter the Connection Secret from the Orion page here.

Make sure to copy the full connection secret from Orion (use CTRL+A), else you may notice an error when you try to Submit it. Lastly, set the Popup Style to ezyVet (cosmetic-only, up to preference) And select your PMS (CRM) from the dropdown menu. Remaining settings can be left as-is. Click Submit to save these settings.
Installing the Web Extension
Open your browser and head to https://chromewebstore.google.com/detail/fetchit%C2%AE-veterinary-produ/lhainjbpogdeboaejgndkfaomhhkajkk
This is page for the Fetchit Chrome Extension that needs to be installed for the desktop application to open records on Cloud browser-based PMS

Click Add to Chrome to install the extension
Once installed, make sure to pin the extension from the Chrome Extensions menu
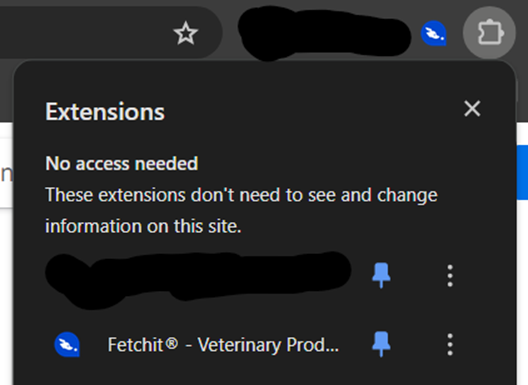
Once pinned, right click the Fetchit extension icon and click on Options

On the Options page,
Select your PMS from the dropdown menu
For ezyVet
Copy and Paste the customer’s ezyVet portal URL.
Remove any trailing characters so the last characters are ‘.com’
Select “Last Tab” from the second dropdown. This ensures that patient records are pulled in the latest existing chrome tab.
“New Tab” opens each patient record in a new browser tab.
Once you click Save, the Extension should turn blue. If not, right click it and click Reconnect.
This marks the end of the Fetchit installation on workstations for Cloud PMS
To verify your installation was successful,
Right click the Fetchit icon in the taskbar tray and open the History window.

You should see some entries if this customer already used a phone system, and this wasn’t a first-time install. To verify you correctly saved the connection secret, press the Test Broadcast button on Orion. This will create a red “Broadcast 0 0000-0000” popup appear on the screen. If it doesn’t, the Connection Secret is incorrect; re-enter, save and try again. Lastly, call the clinic where you just did this installation. You should see a popup show for your own call. This verifies that the Fetchit desktop application works (you saw a popup) and the phone worker/Fetchit service listening to incoming calls, or the Caller ID box works as well. Clicking the Fetchit/Copy button on the popup should open the browser to the customer’s PMS page. If it doesn’t verify the Web Extension was installed and configured properly.
Testing with Broadcast
During the install verification step you have the ability to send a red and blue bubble to a client for connection verification, simply click on switch to toggle to blue

This will send a blue bubble but you can do a little bit more than that. You can also spoof a call
Here’s how to do that
- Copy the
Internal Identifier - Go to Call History
- Find your
Internal Identifierin Call History - Inside this page you’ll find a table of Calls
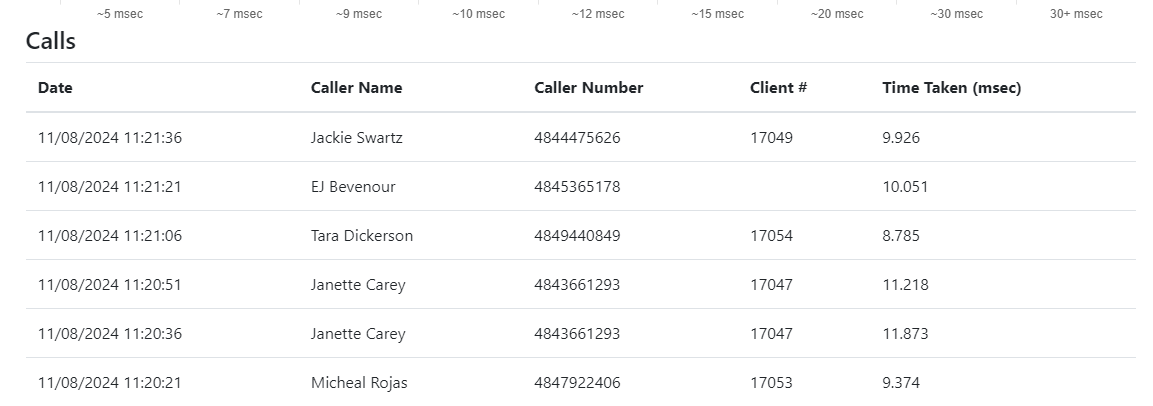
- Copy a
Client # - Press the back button a couple of times until your back to the Test Broadcast
- Here you can paste the number into
Client # - You can also change the Phone number and the name if you’d like too
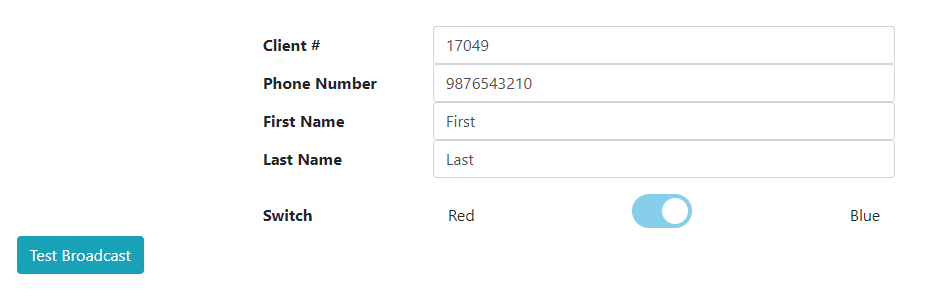
- Click the Test Broadcast and a bubble should appear on the client’s machine
What’s the point of all this?
You are able to actually click on the Fetch it button and see if the application successfully opens up the PMS. Or perhaps you’re testing something specific that’s happening with a bubble. It can also be good for checking to make sure blue bubbles are making it a client.
Troubleshooting Issues
Problem: Where is the settings file located?
Solution: This depends on which version of Fetchit you are running.
If you are using Fetchit version 1.x or earlier, the settings are stored in an .ini file. You can find this file at the following location:
%USERPROFILE%\AppData\Roaming\FetchITWin32Client\settings.ini
For Fetchit version 2.x or later, the settings are stored in the Windows Registry. You can find the relevant registry key here:
HKEY_LOCAL_MACHINE\SOFTWARE\Fetchit
Additional Notes:
- If you are unsure which version of Fetchit you are running, check the version number in the application’s “About” section or by consulting the documentation provided with the software.
- Administrative privileges may be required toaccess the registry or the file system.
- Always back up your settings file or registry key before making any changes to avoid accidental data loss.
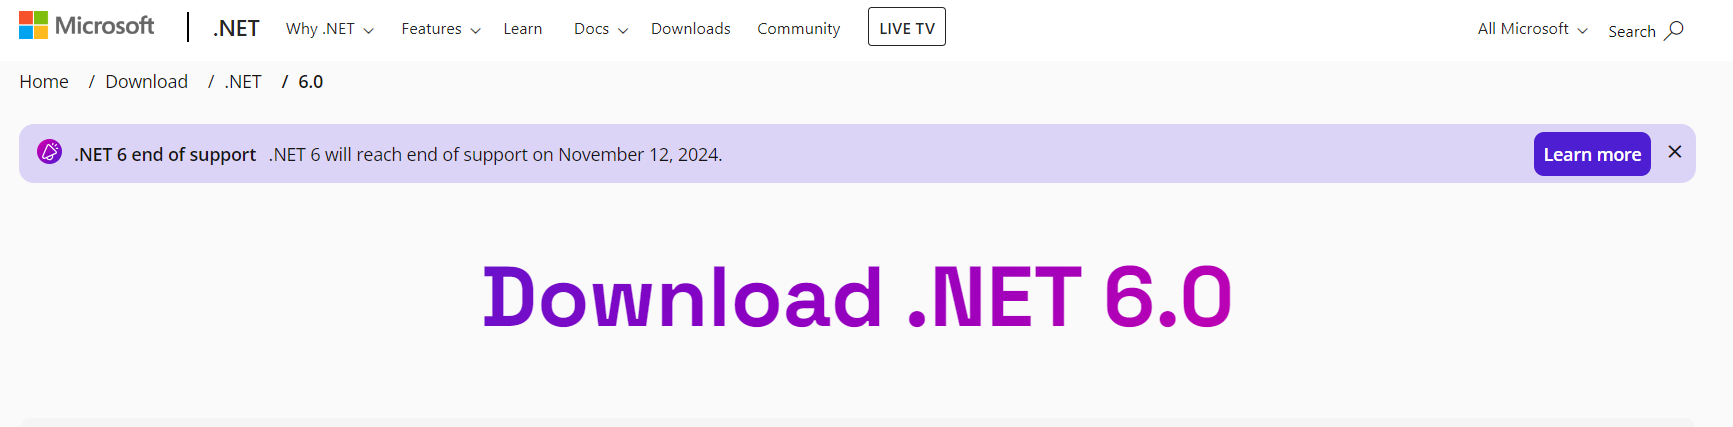
Problem: Installer runs into errors (e.g. Cannot install FetchIt on Systems without .NET Core 6.0)
Solution: Download the .NET 6 runtime for Windows x86 here
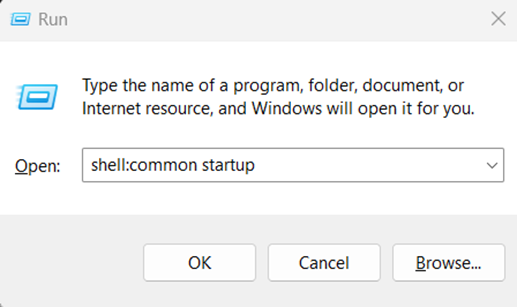
Problem: Fetchit does not launch at startup!
Solution: Check if there is a Fetchit shortcut in the startup or common startup folders. If not, add one to common startup.
You can navigate to either folder by opening the Run dialog and typing shell:common startup
Alternatively, if the Fetchit shortcut was set to run in administrator mode, Fetchit may not auto-launch at startup if the default logged-in user is not an administrator at startup.
Problem: Fetchit does not open the patient record in AVImark, Cornerstone, Impromed.
Solution: Try running Fetchit as administrator. On some machines, Cornerstone/AVImark/Impromed are run with elevated UAC privileges. This means that Fetchit also needs to match privileges to interact with them.
Problem: On Impromed, when Fetchit is pressed to pull up a client record, multiple clients show up in patient results page.
Solution: Set the Impromed search bar to the exact match option so that it only returns one unique human customer. There may still be multiple results sometimes but that’s because one human customer may have several pet animals under their account.
Problem: The Fetchit service stops immediately after starting it or throws a 1063 or 1060 error code.
Solution: Some part of the Fetchit service was misconfigured. Open the fetchitServiceConfigurator and ensure all details are entered correctly.
For AVImark, ensure the UNC path to the AVImark folder is correct. Test this path in File Explorer to validate your machine can actually access it.
For Impromed, ensure the case-sensitive name for Impromed’s server and database name are correct. Open SQL Server Studio on the server machine to view the correct Impromed database and server name. The Impromed database name is usually IMPROMED or Impromed (case-sensitive)
Lastly, check the Event Viewer in Windows to get a detailed description of why the Fetchit service crashes.

Open the Event Viewer and navigate to Windows Logs > Application and search for Fetchit Service and .NET runtime related errors.
Problem: Fetchit installer/uninstaller does not complete! Throws an error
Solution: Usually, this is caused by the logged-in user not having the correct permissions to access the Temp folder in Windows which is often protected. Open the Run dialog, type %tmp% to head to the Temp folder. Right click this folder > Security and ensure the user that is logged-in has full write, read permissions.

Reasons why bubbles may not appear in Fetchit
Inactive Accounts
Inactive accounts may not display the bubbles for incoming calls associated with that account
Incorrect Configuration Paths
If the path to the CRM, such as Avimark, is incorrectly specified, such as using the wrong slash character, can cause bubbles from appearing
SQL Server Issues
The SQLServer service (FISQL service) must be running and properly connected. If the service is down or the connection fails, bubbles will not show up. This can sometimes be due to the connection closing and failing to reopen
API Dispatch Failures
The CoreDial API might not be dispatching call information correctly. If the API is not sending the necessary data, Fetchit cannot display the bubbles
Software Versions Mismatch
Running different versions of Fetchit on the server and workstations can cause incompatibility issues, leading to bubbles not appearing. It is essential to have the same version running on all machines
Registry Configuration Issues
Legacy versions of Fetchit might read configuration information from the registry, which can interfere with new versions. This mismatch can prevent bubbles from displaying correctly
Permissions and Admin Rights
The Fetchit application and its associated services must be run with administrative privileges, if not it may not function correctly
Incorrect API Configuration
Ensuring that the Schultz Technology API key option is correctly checked in the Clearvoice settings is crucial. Incorrect API configuration can prevent bubbles from appearing for incoming calls
Database Connection Issues
The database server needs to be properly configured and connected. If there is an error with the SQL Server installation or configuration, Fetchit will not display bubbles
Inactive Fetchit Service
The Fetchit service must be running on both the server and workstations. If the service is not running or not properly configured to restart automatically, bubbles will not appear
API Key and Configuration Errors
The correct API key and configuration settings must be entered during setup. Any mistakes here can prevent the bubbles from appearing
Version Mismatch
If different versions of Fetchit are installed on the server and workstations, compatibility issues may arise, preventing the display of bubbles
Network Issues
Network problems, including latency or restrictions by network security tools (like firewalls or antivirus programs), can prevent Fetchit from receiving the necessary data to display bubbles
Server Path Issues
When setting up Fetchit with certain CRMs like Avimark, the path to the CRM must be correctly specified. Errors in this path, such as incorrect slashes or trailing characters, can cause issues
Permissions Issues
The Fetchit application and services must be run with administrative privileges. Insufficient permissions can prevent the application from functioning correctly
API Issues with Phone Systems
Problems with the phone system’s API, such as CoreDial, can lead to call events not being dispatched correctly, resulting in no bubbles appearing
Legacy Version Conflicts
If both legacy and new versions of Fetchit are installed or there are remnants of a previous installation, this can cause conflicts and prevent bubbles from displaying correctly
Service Configuration and Execution
Issues with service configuration, such as incorrect or missing settings in the Fetchit Service Configurator, can lead to no bubbles being shown
Network Layer Issues
There is a performance degradation related to the network layer, which can cause bubbles to be delayed, dropped, or not appear at all. This is not related to high traffic or load but rather to issues with the network layer itself
SSL Certificate Expiry
If SSL certificates expire and do not auto-renew as they should, this can prevent Fetchit from connecting to the internet, which would stop bubbles from appearing
API Server Issues
Problems with the CoreDial API server, which is responsible for dispatching call events, can prevent bubbles from appearing. This issue requires intervention to restart the server or provide a more permanent solution
Compatibility Issues with New Software Versions
There may be compatibility issues with newer versions of software like AVImark, which can lead to Fetchit not displaying bubbles correctly. This requires updates to integrate the new software versions
Azure Cloud Server Misbehavior
A server in the Azure cloud might intermittently refuse to respond, leading to customers not getting bubbles at times
CoreDial API Server Issues
Problems with the CoreDial API server, which dispatches call events, can cause bubbles not to appear. This may require a server restart or a more sustainable fix
Compatibility Issues with New Software Versions
Compatibility issues with newer versions of software such as AVImark can lead to bubbles not appearing which requires updates to integrate these versions
System Tray Visibility
If Fetchit does not appear in the system tray or the icon shows “Fetchit is already running” without displaying bubbles, this indicates a potential issue with the application
Specific Application Integration Failures
In certain setups, when trying to click on a bubble, it may either not work properly, disappear, or bring up an error like “Avimark is not running,” indicating an issue with the specific software integration
Server Reboots
Sometimes, the machines may have just been rebooted, which might interrupt the proper functioning of Fetchit, leading to bubbles not appearing
Service Not Running on the Server
The Fetchit service might not be running on the server, causing issues such as bubbles appearing red instead of blue or not appearing at all
Issues with Specific Demo Environments
In demo environments, issues such as bubbles not appearing or showing up as the wrong color can occur due to incorrect settings or updates
Misconfigured Client Systems
Some systems might be misconfigured, leading to problems like bubbles not coming up correctly or the system not recognizing certain clients
Incorrect Caller ID Box Setup
If the clinic has changed phone systems (e.g., from analog to VoIP) and the Caller ID box has not been updated or configured properly, bubbles may fail to appear
Demo Environment Issues
Specific issues related to demo environments, such as incorrect software configurations or outdated setups, can lead to Fetchit bubbles not appearing as expected
Bubbles Not Triggering Correct Actions
In some cases, even when bubbles appear, they may not function correctly, such as not bringing up the correct client information when clicked, indicating issues with the integration or configuration of Fetchit
Memory Issues in Azure Kubernetes Service
Memory issues in the Azure Kubernetes Service, can result in no bubbles being delivered temporarily until the issue is resolved
Server Reboot Issues
Frequent reboots of the server or client machines, particularly over weekends, can disrupt the Fetchit service, leading to bubbles not appearing consistently
Client Data Sync Issues
If there are issues with syncing client data between Fetchit and other systems like AVImark, bubbles may fail to appear or display incorrect information
Performance Lag
Sometimes, there is a noticeable lag between when a phone call comes in and when the client information appears on screen, which can cause bubbles to either appear late or not at all
Misconfiguration of Services
Occasionally, Fetchit services may be misconfigured on certain machines (e.g., incorrect popup style settings), leading to bubbles not functioning as intended
Partial Software Installs
If Fetchit is only partially installed or if different versions are running on different machines within the same clinic, this can cause bubbles to either not appear or function incorrectly